Best Practices for Refining Your Product Photography
Interested in improving your product photography skills? Check out our nine best practices for creating compelling product photos

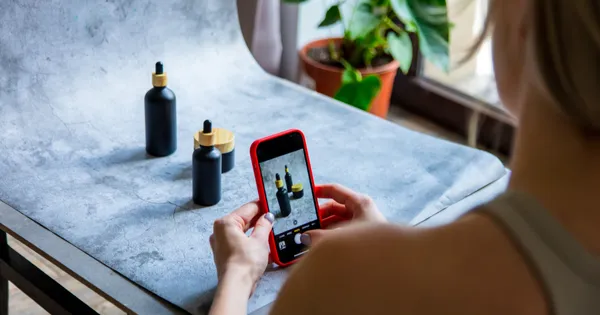
Product photography may seem intimidating to an ecommerce store owner. However, these days it’s easier than ever to set up a simple photography studio in your home or office where you can shoot fantastic product images yourself. Whether you have advanced camera gear, a simple point-and-shoot, or your personal smartphone, following these basic tenants of product photography will consistently give you professional-looking product photos and increase your conversion rates.
1. Plan out your photo shoot
It’s not enough to decide on a whim to get out your camera and snap some photos—it’s important to have a vision or intention for your shoot. If you’re at a loss, try imagining the kind of publication you’d like to see your product photos in. Then, look up those publications and take note of how they approach their product photos. What kind of lighting do they use? What kind of background? Which angles do they shoot from? Take your favorite aspects of those product photos and apply them to your own work.
2. Shoot against a white or neutral background
When it comes to your product photos, you want your products to shine. In most cases, your best bet will be to go with a simple, neutral background—think white, beige, gray, or black. Try finding a neutral wall, sheet, or even a white sheet of paper to place behind your product to get the desired effect.
White is an especially great starting point because it looks clean and is easy for beginners to shoot. It will help your camera’s white balance calibrate accurately, ensuring that the colors in your photograph are realistic and the product will meet the customer’s expectations. Additionally, if you’re running product listing ads through comparison shopping engines like Google Shopping, white backgrounds are a requirement.
3. Pay attention to your lighting
Even if everything else is perfect, bad lighting will completely ruin an image. In most cases, your best bet is to use soft, diffused natural light with multiple lighting sources if possible. This can mean shooting:
- Outdoors at dusk
- Outdoors on an overcast day
- Indoors next to a window
- Indoors with multiple lighting sources at multiple angles
If outdoor lighting isn’t an option and your products are small, you can always make your own simple light tent to get the soft, diffused light as well.
4. Steady your camera
A steady camera will make a lot of difference in the quality of your shots. Sharper photos come from steady cameras, so if you’re planning to take many product photos over time, consider purchasing a tripod. Otherwise, you can find something around your house or office that will work, such as a stool or a tower of hardback books.
Note: For best results, use the timer function on your camera and set a 2-second delay. That short delay will allow your camera to re-steady itself and refocus after you have pressed the button to take a photo.
5. Take multiple shots
Customers looking at your site will only see the final, perfect shot, but that doesn’t mean you’ll get your ideal shot in the first, second, or even third take. Instead of focusing on getting that one perfect shot, take many photos of your product with the expectation of getting three or four solid photos to choose from later. A variety of photos will also indicate to customers that you are confident in what you’re selling.
When taking your photos, remember to include some of these variations:
- Different angles: In profile, from the front, from above, etc.
- Different proximities: Far away (to see the size of the product in relation to something else), close-up (to catch the details), etc.
- In use: For example, if you sold watches, you could take a photo of the watch on a wrist instead of on a flat surface.
6. Take wide-angle shots
Wide angle shots allow you a little more leeway when editing your photos, and they leave you the freedom later to add text on one side or the other. While you’ll want to crop your photos more closely when you’re posting them on your website, it’s important to take a step back and give yourself room on each side of the product while you’re doing your photo shoot. This will open up a world of options that will help you down the road.
7. Make sure to edit...
Always edit your product photos after you’ve taken them to ensure that they look the best they can. Software like Adobe Photoshop and Adobe Photoshop Lightroom are pretty tried-and-true, but if they are a little out of your budget, you can try free photo editing services like Gimp, PicMonkey, Canva, or a number of others that will be able enhance your product photos.
When editing your photos, pay attention to properly cropping your image and adjusting the brightness and contrast. For cropping, get rid of excess space as you see fit, and keep in mind that square, consistently-sized product photos look more professional than irregular, rectangular ones. In terms of brightness, contrast, and color, use image enhancer tools in your photo-editing software to bring out the very best in your image.
8. ...but don’t over-edit or rush the process
The more you edit, the more you will decrease the quality of a digital photo, so only do the bare minimum. Your main goal is to ensure that the background of your image doesn’t distract the viewer from the product.
Additionally, we highly recommend saving a copy of the original (untouched) photos for future uses or in case you make a mistake. You never know when you might cross the line into over-editing or have a catastrophic computer issue, in which cases a backup will come in handy.
9. Create a template
For consistent product images, create a template in Photoshop or Canva to ensure that product images remain consistent across your site. Align your products in the center of the canvas and resize them so that they take up the majority of the template. You can do this by eye, but the best way to do it is to create your own guidelines for 90% and 10%, and resize your product so that the longest sides of the product touch the guides.
Final Thoughts
Product photography is a mixture of art and skill, and like most things that combine the two, it may take a lot of practice to find what works for you. But don’t get discouraged—developing your product photography skills is well worth the blood, sweat, and numerous takes.