


If you don’t have a high-end camera, you are out of luck when it comes to taking product photos for your online store, right? Wrong—in fact, you’re probably carrying the camera you need in your pocket every day in the form of your smartphone.
Investing in a professional photographer is more of a luxury than a necessity. There’s no reason you shouldn’t be bringing in sales long before you make that investment. Below, we’ll talk about how you can take your pocket computer and produce high-quality product photos using only your smartphone.
1. Set Up Your Space
The first step is to make sure that the scene you are setting will make for a good image. Anyone visiting your site wants to see product-focused, high-quality images that make it very clear what you are selling and what they can expect in the mail. To that end, you want to make sure your products are clean and that your setup is correct before you start snapping. Make sure your lighting looks good (natural light is the best) and your backdrop isn’t too complicated. If you’re on a budget, set up a makeshift photo studio.
2. Choose Your Smartphone Camera
Not all smartphones are created equal, especially when it comes to their cameras. iPhones are known for being miles ahead in this department, but the truth is that newer Android phones are catching up. That means you can finally take great images without having to invest in an Apple product if you don’t want to. Your best choices for a phone camera are:
- iPhone 8 or newer
- Google Pixel 3 or newer
- Samsung Galaxy S8 or newer
- Samsung Galaxy Note 8 or newer
The current standard for phone cameras is around the 12 megapixel mark—anything on that level will give you the image quality you need. Odds are that either you or one of your friends have a camera on your smartphone that will suit your needs.
3. Acquire Additional Lenses
You can add a lot of functionality to your phone’s camera with additional lenses. Close-up or wide angle lenses are very useful for getting regular product shots, and others like the fisheye can help create interesting social media content. You can find reviews on the best iPhone lenses here, and learn more about Android lenses here.
4. Choose Appropriate Settings
Unlike with a film camera, space here doesn’t cost you anything. Choose the largest file size and the highest resolution settings that your phone allows. This will give you the best and most detailed image possible to start out with. Once you are happy with the final product, you can reduce the file size if needed.
5. Clean Your Lens
Lenses are easy to carry everywhere—in pockets, purses, cupholders, etc. Due to their portable nature, they tend to pick up a lot of dust, dirt, and debris. To avoid noticeable smudges and imperfections in your final product, make sure you clean your camera lens well before your photo session begins (and do another quick clean before it starts).
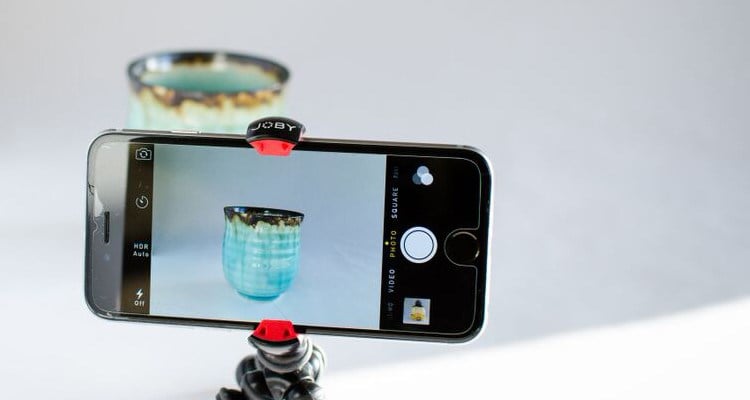
6. Steady Your Camera
Your best option is to invest in a small tripod that will hold your smartphone steady at the best possible angle. This is a tiny purchase that will make a big difference in the smoothness of the process—and your end product. Simply eliminating camera shake will make a major difference and let you keep your camera in place between shots.
7. Take Your Photos—And Avoid Basic Mistakes
You’re now ready to begin shooting your product photos. As you do so, make sure you avoid these common mistakes that novice photographers make with their smartphones:
- Forget taking a selfie: Use your rear-facing camera instead of your selfie cam—it will almost always be higher resolution than the front-facing camera. Also, trying to take pictures with the selfie camera will almost always give you weird angles, which is not worth it in the long run.
Source: Pixc
- Turn the flash off: The flash on your phone is not ideal for quality photos. And while you may have one handy as an inexpensive option, neither is a flashlight. Get your lighting right by using as much natural light as possible and including two LED light sources in your setup.
Source: Pixc
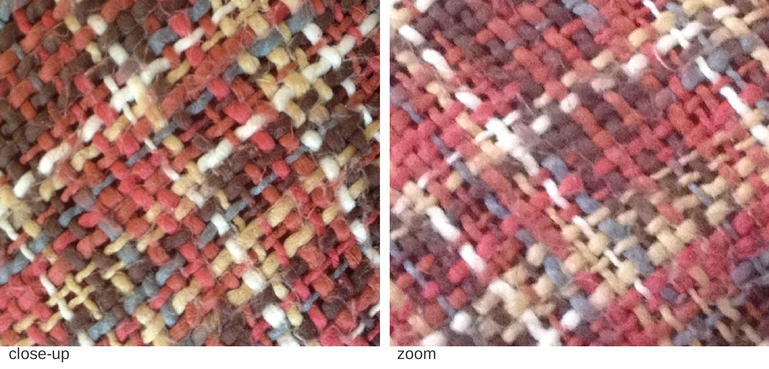
- Don’t zoom in: Digital zoom is not great for picture quality. Unfortunately, it’s the only type of zoom you have with a smartphone camera. If you need a close-up shot, simply move in closer to your product—the finished product will look much better and require less adjustments.
Source: Pixc
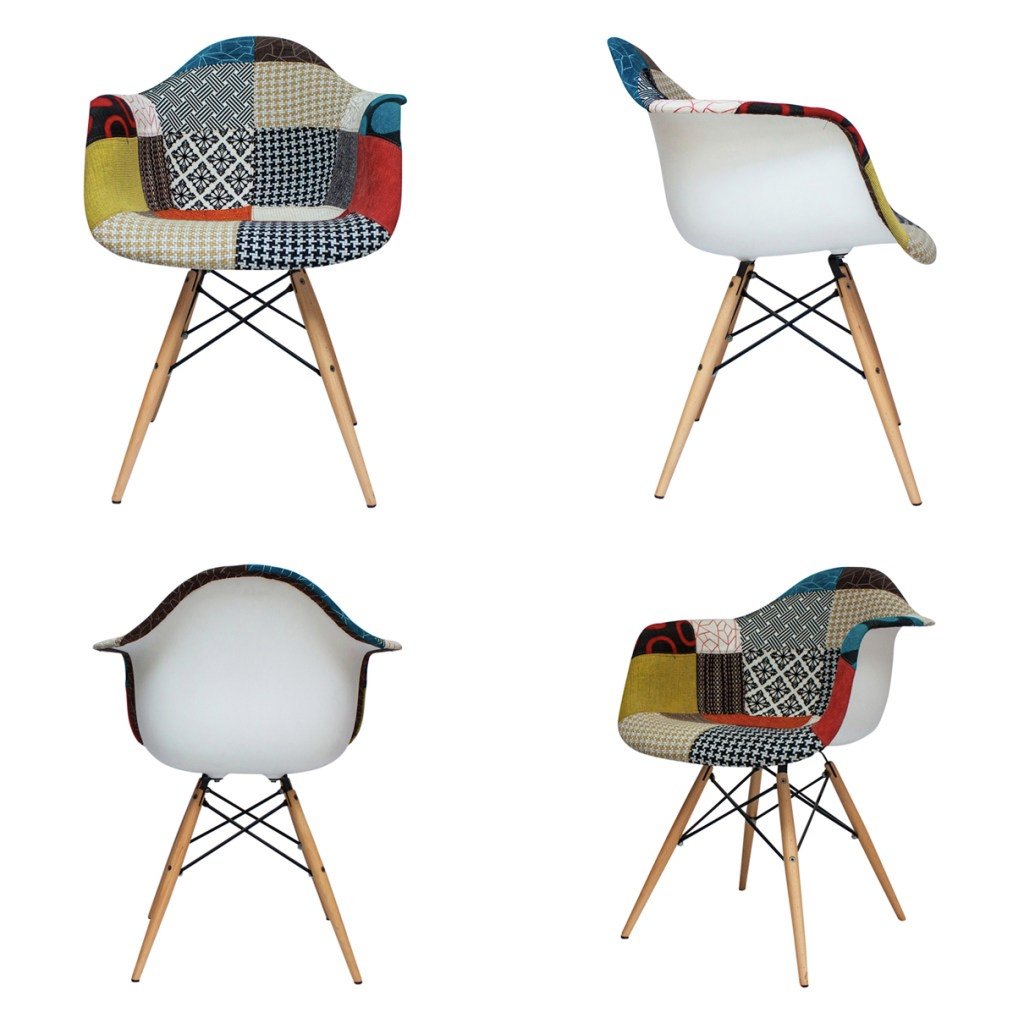
- Take enough detailed photos: Customers will want to see as much as they can before they make a commitment. Make sure to provide lots of high-quality images of your most expensive products to help make the sale. Shoot all the sides and angles you can, and make sure to zoom in on detailed areas and points of use: zippers, buttons, controls, straps, etc.
Source: Pixc
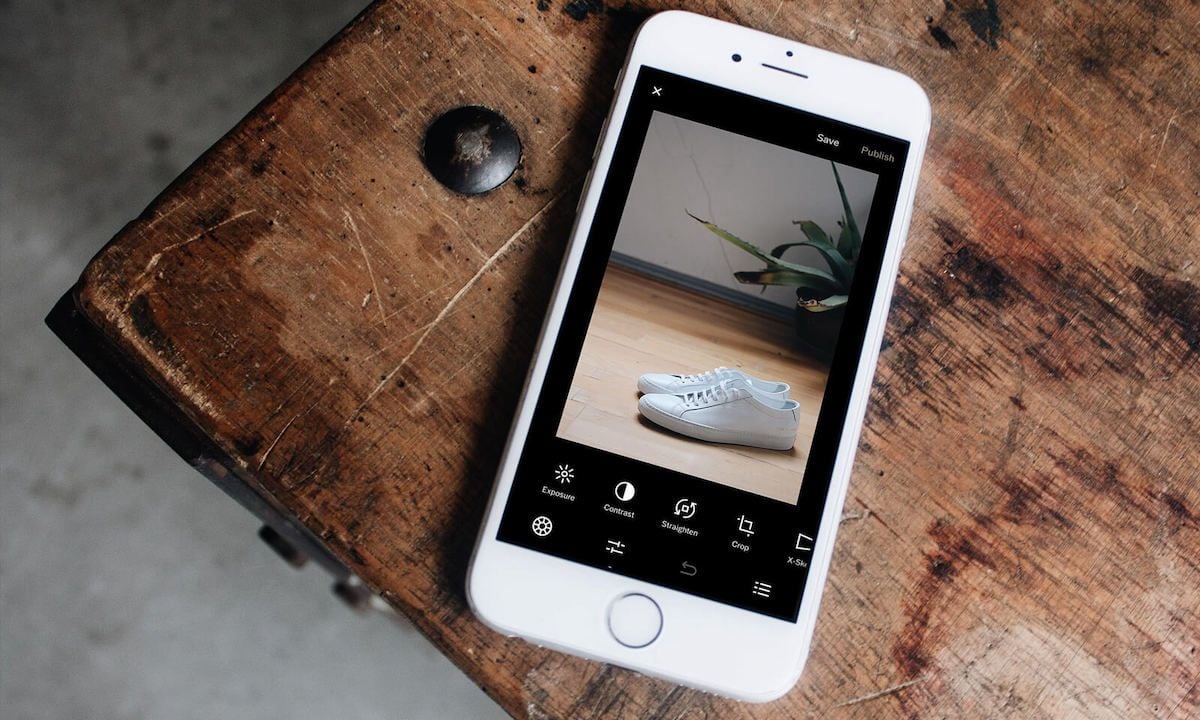
8. Perfect Your Photos
You aren’t entirely limited to the quality of your phone's camera and default settings—there are other ways to go above and beyond to get better images as well. Consider editing your final photos either on your phone or on your desktop to ensure you end up with the best possible images for your customers.
In Conclusion
These days, you no longer have to have a professional camera or even a professional behind the lens. If you need new product images for your store, it’s easier now than it ever has been before to do it yourself. Grab your smartphone, set up your “studio,” and start taking photos of your products. Remember—if they aren’t perfect, you can always take more.