How to Shoot Professional Product Photos Yourself
Don't have the funds to invest in a professional product photographer? Buy yourself time by learning how to take great photos of your products yourself

There's no denying it—product photos are a huge part of your online success. They're visual ambassadors to your customers, showing off your wares and persuading them to "Add to Cart." At their best, product photos increase sales and improve customer satisfaction, as well as help tell your brand’s story. However, there is not always room for professional product photography in the budget.
If you have a good eye, taking on product photography yourself can be a good cost-saving solution. Below, we walk you through how to prepare for and take quality product photos that will convey your products in a positive way.
1. Choose Your Device
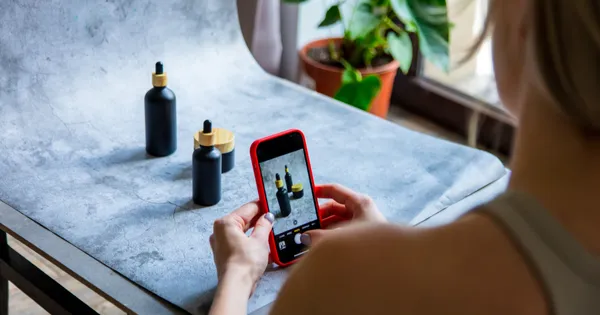
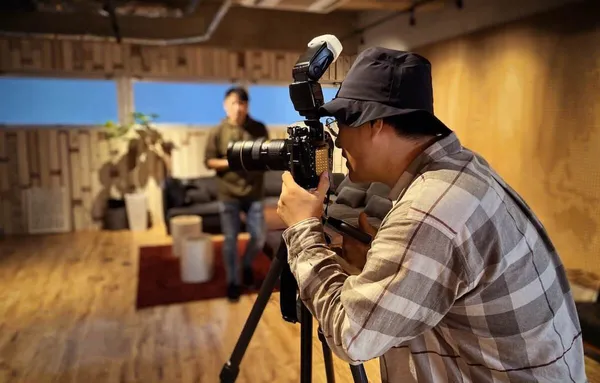
Because these photos will be a representation of your brand and your professionalism, it is strongly recommended to invest in professional camera equipment—especially if you’ll be taking more product (and other types of) photos in the future. If you’re having trouble finding the best camera for you, check out our article on choosing a camera for your product photos—you may even be able to get away with taking product photos with a newer smartphone.
2. Prepare Your “Photo Studio”
Once you have your camera, you’ll need to set up a space to take your product photos in. Keep the following in mind as you prepare your makeshift photo studio of your products:
Get your lighting right
Relying on natural light rather than artificial lighting will give you ample soft light that spreads evenly over the product and produces less shadows. If you’re shooting products in your home or office, set up a shoot near a window on a bright but overcast day to avoid harsh rays. Then, use a piece of white paper or poster board to evenly reflect the light coming in and eliminate any shadows on your product.
Another great option is to build your own lightbox. This way, you can shoot with any kind of light and at any time of the day without spending a pretty penny on a pre-made one. I built my lightbox about six months ago, and it works like a charm.
Create an effective background
An effective background is essential to drawing attention to your products and reinforcing your brand. For most product shots, a plain white background is best because it lets your product take the spotlight and removes any distractions. Find an open area (close to natural light) and lay out a simple white sheet or white poster board. You can even invest in a professional-looking backdrop if you wish. Worried about photographing white on white? Look into the most effective way to photograph primarily white products on a white background.
Steady your camera
The very best product photos are crisp, consistent, and free of blurs. This can be difficult to achieve if you do not have a steady hand or steady surface on which to rest your camera. To ensure that you take the sharpest images, consider investing in a stabilizing tool like a tripod. For smartphones, a simple phone mount can do the trick. If you don’t have the budget for extra camera accessories, try using a table or a stack of books—just make sure they are sturdy and won’t wobble or fall down.
3. Choose Your Camera Settings
With your camera in hand and your space set up, the next step is to adjust your camera’s settings to account for your space. Learn everything you can about it and how much you can control out of the box. Most cameras come equipped with several manual settings. Take the time to understand how to use each of these tools to enhance your images. Here’s a small breakdown of some of the most important settings
White Balance
White balance (WB) is a setting used to correct camera color effects, which helps keep the objects in your image as close to their natural colors as possible. Because your white balance is largely affected by the kind of light in your picture, make sure to adjust it whenever your light source changes. For example, you may switch from daylight to fluorescent light when heading inside to take some indoor pictures.
Resolution
When given the option, choose the largest resolution and the highest quality setting that you can. This will allow you to capture the largest and highest-quality photos possible. You can always shrink images once they have been captured, but enlarging a small photo while preserving the quality is next to impossible. Make sure that the size setting is large (L) and the quality setting is superfine (S).
Exposure
Exposure is the amount of light that you capture with your camera. It’s controlled by three tools: shutter speed, aperture, and ISO.
- Shutter speed is the length of time your camera’s shutter opens to take in light. This controls the amount of light captured and any movement in the frame. A lower shutter speed is helpful in areas where you have less light, but can become blurry if there is movement. As long as your product and camera don’t move, a low shutter speed is fine.
- Aperture is the opening of your camera’s lens that controls the amount of light you take in and the sharpness between the foreground and background. A low aperture takes in more light and provides a blurrier background, while a high aperture takes in less light and provides a sharper background.
- ISO is your camera’s sensitivity to light. A low ISO (100-200) is a low sensitivity, meaning you’ll capture less light. A high ISO (800-1600) is high sensitivity, meaning you’ll capture more light. High ISO settings will increase the graininess of your photographs and result in poor quality. Try not to go higher than ISO 400.
If you use a smartphone that doesn’t include these features, consider adding an application like VSCO, Adobe Lightroom, or Snapseed. These tools provide helpful manual controls, include editing and sharing capabilities, and are used by many professional photographers.
4. Take Your Photos
With your camera and space set up, it’s time to start taking your pictures. Remember to take as many pictures as you can so that you have a wide variety of shots to choose from later. Shoot multiple sides and angles, and make sure to get close-ups of detailed areas and points of use: zippers, buttons, controls, straps, etc. Customers will want to see as much as they can before they make a commitment, and providing them with a complete picture of the product they are interested in will make them feel more comfortable with making a purchase digitally.
Final Thoughts
Product photography isn’t a skill that develops overnight, so don’t feel discouraged if your first few shoots seem like a struggle. Just like everything else, practice makes perfect. If you keep these tips in mind and shoot regularly, you’ll be on your way to professional photography in no time. Don’t forget to edit your product photos as well once you have taken them!