How to Photograph White Products on a White Background
White-on-white photography can seem daunting, but with the right lighting, camera settings, and editing tweaks, it can make for a truly stunning photograph
White-on-white photography can seem daunting, but with the right lighting, camera settings, and editing tweaks, it can make for a truly stunning photograph. Shooting this way allows you to focus all attention on your product and avoid letting colors from your backdrop pull attention. You can shoot white-on-white photographs in your own at-home studio—all you’ll need is a little bit of prep work, time, and patience.
1. Background
Setup is the most important step in the process. First, you’ll need a large, even, white surface to use as your background. For this you can use a reflector, white foam board, or a large white piece of paper. I use a large white poster board that I can bend into a “C” shape. This will ensure that the background will be seamless with no hard lines or corners.
2. Lighting
Lighting a white on white shot can be tricky because you want to avoid losing the product into the background. The trick here is to focus more on lighting the background than the product itself. This will make the background a strong, true white color and bring the product more toward the grey side. This creates strong definition between the subject and the background so that your products don’t blend in and get lost.
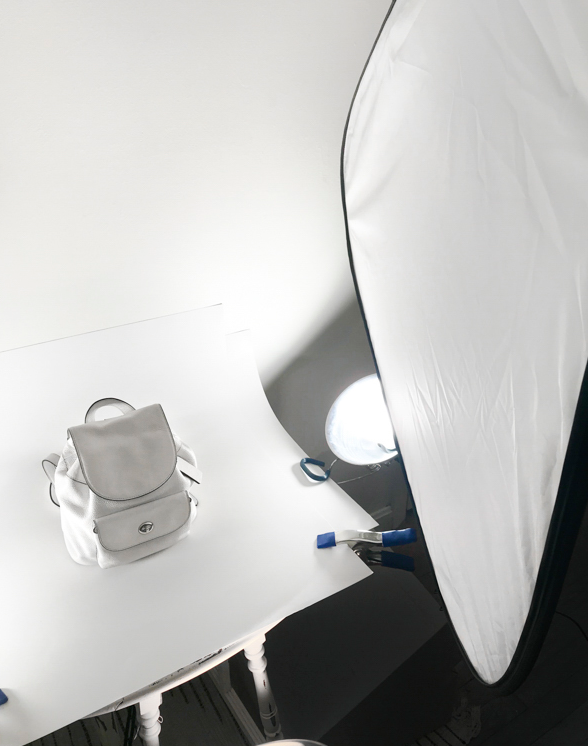
Natural light is ideal, but artificial light can be used as a substitute if needed. For artificial light, use a basic clamp light with a daylight-balanced bulb. This is a more blue-toned bulb that does not include any yellow tones. Using a daylight-balanced bulb will help to not disrupt the white balance in your image.
Put two clamp lights on either side of your setup to light the background, then use a reflector to bounce the light back to the front. This will let you control and shape the light, making it easy to control highlights and shadows. You can experiment with both lights and reflectors to get the right balance of light and shadow to find what's best for your image. With both light and reflector, you can change distance and angles until you get the image you want.
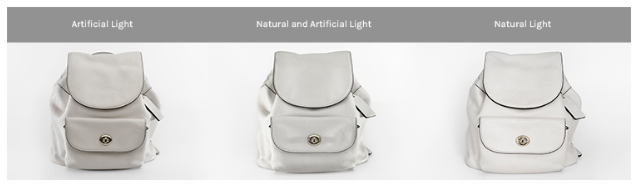
Adding natural light lets you add more light to the image as a whole. Position your setup so that the natural light source lands on the front of your scene. Play with the amount of natural light you let in to control the overall feel of the image. Be careful to not overexpose the image by using too much natural light. Using white and black reflectors will help to create a nice edge where the product ends and help to light the front of your product.
As you are shooting, take a look at the shots on your camera. You’ll want to make sure the shadows are harsh enough on the product so that it doesn’t blend into the background. You want to be able to clearly see where the white of the product starts and stops in comparison to the background.
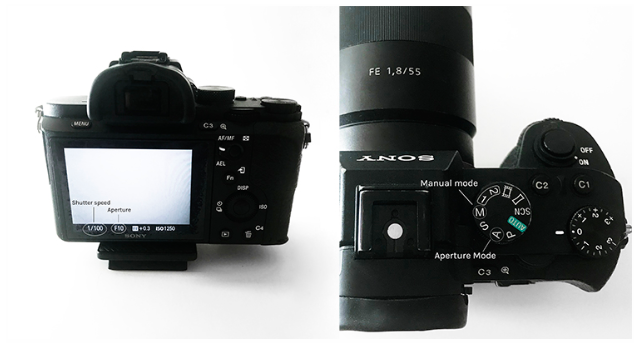
3. Camera Settings
To get the best quality out of your image, you will need to shoot in manual mode. This will give you more control over the final outcome of your images. There are two settings that you’re looking to control: Iso and f.stop.
Iso is essentially the level of sensitivity to light. The higher your ISO number is set, the brighter your image will be. There is often a trade-off though: too high of an ISO will result in a grainy image. ISO numbers typically run from 100 to 6400. The images you see here were taken between 100 and 200.
F.stop is the diameter of the opening that allows light into your camera to register on the film or digital sensor. The progression and numbering system here is a bit more complicated; essentially though, the higher the f/number, the smaller the opening is. For the images here, I used f/10 to f/16 to put a sharp focus on the product edges.
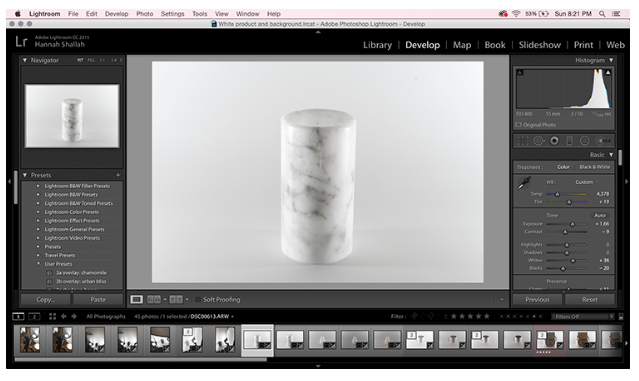
4. Post-Processing
Once you’ve shot your images, it’s time to go into Lightroom and Photoshop to fix minor details like imperfections on the product and unwanted reflections that can take away from your product.
Shadows can be tricky when shooting white on white, but you can fix this in Photoshop using the “burn and dodge” tool to pull those edges away from your background. Once you’ve done that, you can lighten up your background a bit, and you’ll have a beautiful image ready to go.